Monday 27 April 2020

Block Eleven

Six inch block
Cut one - 2 1/2 inch square
Cut four - 2 1/2 x 4 1/4 inch rectangle 
Remember to sew using a quarter seam allowance.
Place the centre square on top of one of the rectangles.
Ladies, please watch video on how to sew this first seam.
Press seam allowance toward rectangle.
Place the next rectangle on top of the square and first rectangle.  This time sew in place across the whole seam. Press away from centre.
 Continue with the last two rectangles to sew
When sewing the last rectangle in place, remember to move the first rectangle out of the way.  I folded mine away from the edge and pin it.
Ladies, do not forget to watch this second video before sewing the last seam.


Twelve inch block
If you would like to stitch a twelve inch block, you have two options.
Make four six inch blocks and stitch them together to form a twelve inch block.
Or stitch a single large block.
Cut one -  4 1/2 inch square
Cut four - 4 1/2 x 8 1/2 inch rectangle
Stitch together as above.


Take care and keep safe.  I am looking forward to catching up with all your news soon. x

Monday 13 April 2020

Preparing your binding strips!

This is meant to be a simple and quick tutorial.  

Cut the binding strips. 
Place two strips ends at a right angle over lap them, with right side together.  Draw a diagonal line.

 Stitch on your drawn line.
 Cut 1/4 inch from your stitching line. Remember to cut on the correct side of your stitching line.
Press the seam open.  Remember this is a bias edge, so press with care.  This reduces any bulk when stitching your binding on to your quilt.
You can cut your 'dog ears' off.  Now you need to repeat if you require your binding to be longer.


Monday 6 April 2020

Block Ten

                      6 inch block                  8 inch block                   12 inch block            
Fabric A        4 x 8 inch                       5 x 10 inch                      7 x 14 inch  
Fabric B        2 x 8 inch                       2 1/2 x 10 inch                3 1/2 x 14 inch
Fabric C        8 x 3 1/2 inch                10 x 4 1/2 inch                 14 x 6 1/2 inch
Fabric D        3 1/2 inch square           4 /12 inch square             6 /12 inch square 

(6' - 8' - 12' block size)

Cut fabric A in half lengthways.

Sub cut into squares (2 inch - 2 1/2 inch - 3 1/2 inch).  Now you will have eight squares.

Sub cut fabric B in squares. (2 inch - 2 1/2 inch - 3 1/2 inch). Now you will have four squares.

Sub cut fabric C in rectangles (2 x 3 1/2 inches - 2 1/2 x 4 1/2 inches - 3 1/2 x 6 /12 inches). You will now have four rectangles.

Put fabric D and B to one side for the moment.
Draw a diagonal line on the back of your eight fabric A squares. Use a pencil or NON permanent maker.

Place one of your squares on the rectangle. Right sides facing each other.

Stitch on the drawn line. Press your stitching to set the seam.

When trimming the corner, remember to trim on the outside corner of the square.

Press away from the rectangle.

 Place another fabric A square on the rectangle as shown and repeat.

Note to my ladies - please watch the video clips!


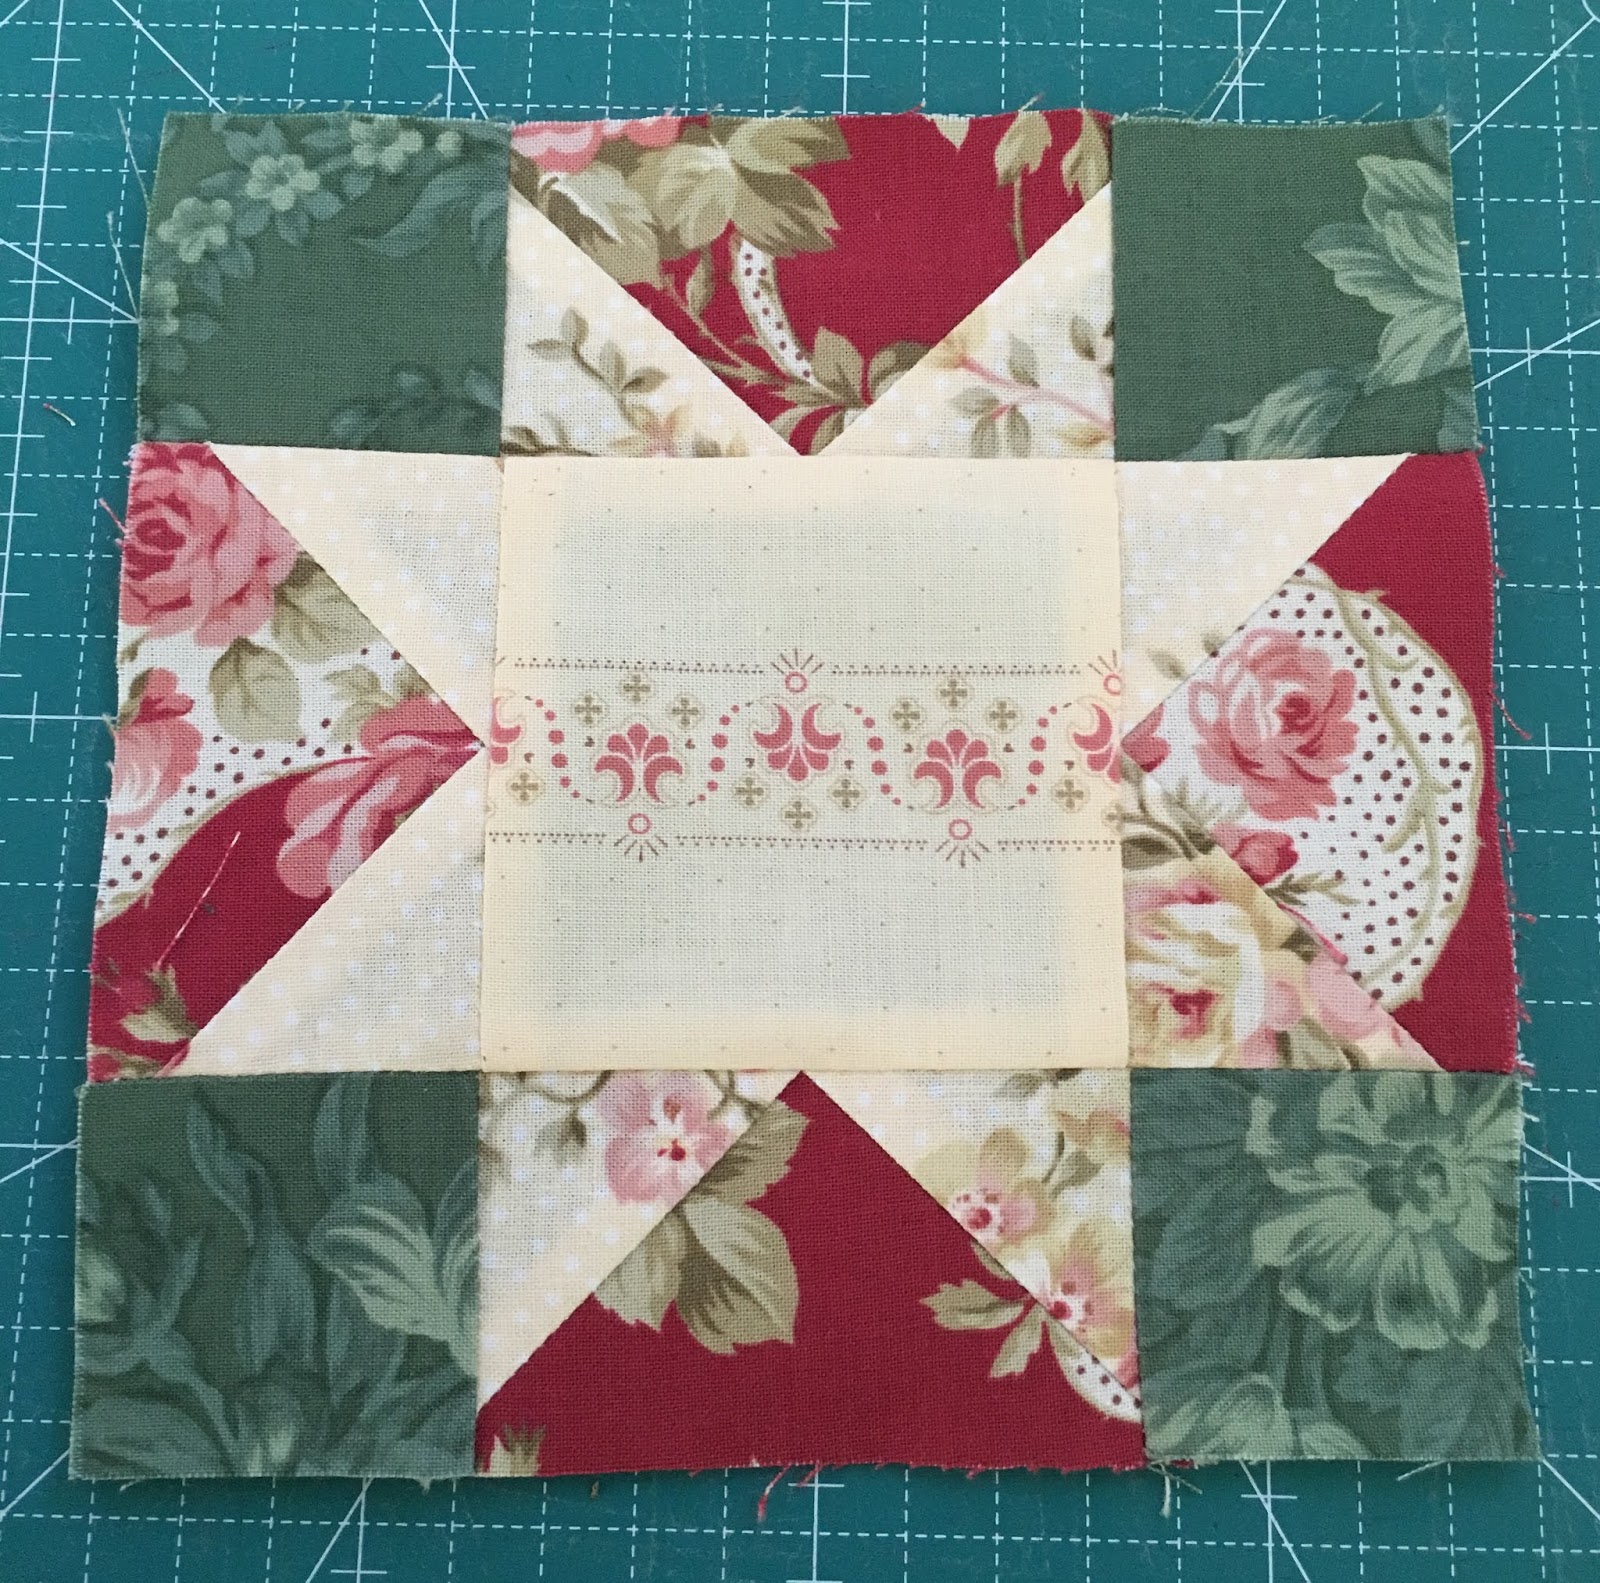
 Now we have four flying geese units.

Place one flying geese unit on top on the fabric D. Stitch in place using a 1/4 inch seam allowance. Press towards the centre square.

Note to my ladies - please watch the video clips!

Place a second unit on the opposite site of fabric D square.

Stitch a fabric B square on each side of the other two flying geese units. Press towards the square.

Sew the three rows together to complete your block.  Ladies do not worry about trimming your blocks, we can square them all when we met again.

Take care and keep safe.  I am looking forward to catching up with all your news soon. x